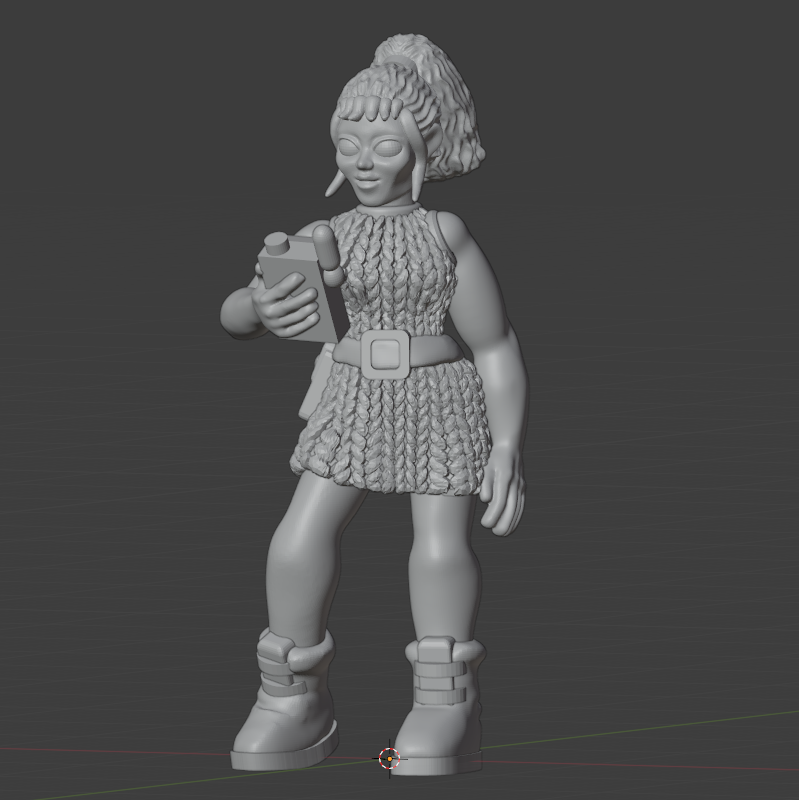
3D model of Hyolee
Yesterday I finished up a 3D print model of Hyolee from GearHead (which will be uploaded to Patreon soon, then my itch and Cults3D shops later). I’ve been working on these games for over 20 years now, and all that time I’ve wanted miniatures of my creations- which, thanks to 3D printing, is now a possibility. Anyhow, the bit of this miniature that gave me the most trouble was adding the knit texture to her dress. First I tried drawing the cords by hand, but that was a Bad Idea. After that I tried using a texture brush in sculpt mode, but that doesn’t work great for textures that need to be evenly applied to an entire surface.
Eventually I learned how to apply a texture so it physically deforms the mesh it’s attached to, but it’s not as simple a process as I hoped it would be. So now I’m writing this blog post in the hopes that my onerous journey of pain and suffering experience might be useful to other sculptors. To demonstrate the steps involved I’ll be making a miniature of the Servitor, a synth monster from GearHead Caramel.

I chose this monster for the tutorial because let’s be honest- it’s just a d20 with legs. So I start with a ico sphere with 1 subdivision.

Next, I choose a texture to apply to the model. I want to retain the geometric shape but give it an organic looking skin. I found this texture on pixabay.com/:

I add a material to the ico sphere, then set the Base Color of the material to an image (by pressing the circle that doesn’t really look like a button, but trust me it’s a button, to the left of the color selector). Then I set the Vector to “Generated” and the mapping method to “Sphere”, resulting in the following:

This looks pretty good to me as an organic texture. But right now it’s not a texture, it’s a material. Materials and textures are different. I don’t know why they are different. I have very little experience with 3D graphics and just want to make tiny plastic toys. Is that too much to ask? No, no it isn’t. But it is going to take a bit of work.
For the next step, I’m going to prepare the ico sphere to accept the texture. Note that we’ll be using the Deform modifier, and the Deform modifier only works with the vertices the model already has (in this case 12). You could use the Subdivision Surface modifier to split each face an arbitrary number of times, but instead I’m heading into Sculpt mode to Remesh the model with a Voxel Size of 0.05m. This will provide us with a metric crapton of vertices, which will come in useful later.

Go from Sculpt mode to Edit mode and UV/unwrap the ico sphere. You can use the regular unwrap menu item or one of the fancy ones. Don’t ask me; I don’t know the difference.
Alright, now our prep work is done. Next we need to convert our material to a texture. You’d think this would be one of those things that is a simple menu option. Oh, you innocent fool, you sweet pixel art child. We haven’t even started that process yet.
Step one: switch your render engine from Eevee to Cycles. Eevee doesn’t do this.

Next, go into the Shader Editor, where we will find the material we just created waiting for us.

We’re going to have to do a few things here. First, get rid of that Principled BSDF node and connect the texture directly to the material output. The Principled BSDF handles lighting for your scene, but we want to apply this texture without concern for lighting. We also need to add a new Texture/Image node with a new image- make sure the image is pretty big (I selected 4096 x 4096; I heard there’s some advantage to using a power of 2 but dunno why) and click the 32 bit float box.

Add a UV Map node, select the UV Map of your ico sphere (which should just be named “UV Map” unless you renamed it) and connect this to the Vector input of the Image Texture. Then, open up the Scene panel over on the right, and with the Image Texture node selected press the “Bake” button.

When the baking process finishes, you can find the baked texture in the image editor. You will note that it is quite different from the texture you started with. Save it to disk.

Head back into the 3D view. Create a new texture, and load the baked texture you just created (NOT the original texture! That’s important!).

Add a Displacement modifier to the ico sphere. Set the coordinates to UV and the UV Map to the UV Map created above (which, again, should be named UV Map unless you renamed it). Bam! Immediately the cube is deformed to match the texture, with bright/white areas being raised and dark/black areas being recessed.

You can play around with the Strength and Midlevel values until you are happy with the thickness of the deformation. In general, I try to make sure that texture extends at least 0.3mm above the surface. Details on miniatures should be exaggerated, so when in doubt go thicker than you think you need.
Also: you’ll probably notice that using a straight black and white texture resulted in sharp deformations. For a more organic look, I should have used a texture that has smoother color gradation. For example:

I’m not entirely happy with this texture either, but I’ve got some more to try. Anyhow, that is how you transform a material to a texture to a mesh in Blender3D. Hooray!

